Subscribe For Free Updates!

We'll not spam mate! We promise.

Showing posts with label Blogger widgets. Show all posts

Monday, 23 September 2013

How to Add Professional Notification Bar in Blogger

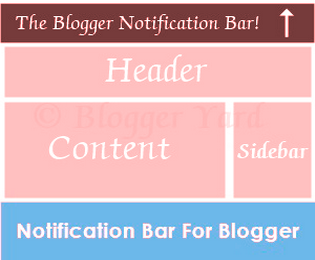
Add Professional Notification Bar in BloggerToday were releasing a brand-new fancy style dark-colored notification bar for your blogger blog. This notification pub will show your own desire post which you wish to show up towards the top of the blog. However most of bloggers display the particular hot deals or popular post through this blogger notice. The most big advantage of having notification message towards the top of the blog may exist remain regardless of whether we grab the particular mouse down or scrolling down and up. This top righted bar will interact with every page or post. So in case you have not yet additional a notification pub into blogger then we may recommended to put this simple dark-colored color notification bar in your blogger blog. I have seen many of comments posted by new bloggers in blogging forum, how could we convey a notification message alert bar in blogspot weblog. So in currently article we will reveal, How to convey a professional like notice bar in blogger blog.

This is the notification bar that you place in your blogger blogspot.  This Notification bar is very simple created in HTML and CSS.

Professional Notification Bar

How to add This

This is the very basic and a couple steps method. You can easily add this particular bar as part of your blogger web site by comply with the down below given methods. Remember this particular notification bar is for planning, if you need to add inbound links, then you can add your wish links into the html coding.

Step 1:

Login to blogger dashboard.

Go to Template >> Edit HTML

Now find this ]]></b:skin> by pressing Ctrl+F.

Paste the below code just above/before this ]]></b:skin>.

"

#bloggernotificationWrap {
    display: none;
    height: 41px;
    margin: -41px 0 0;
    padding: 0;
    position: fixed;
    width: 100%;
    z-index: 999999;
}
#bloggernotification {
    background: none repeat scroll 0 0 #000000;
    border-bottom: 3px dotted #FFFFFF;
    border-radius: 10px 13px 7px 5px;
    color: #FFFFFF;
    font-family: arial,sans-serif;
    font-size: 14px;
    font-weight: bold;
    height: 37px;
    margin: -30px 5px 5px -1200px;
    padding-top: 7px;
    position: relative;
    text-align: center;
    text-decoration: none;
    text-shadow: 1px 1px 1px #000000;
    width: 500%;
    z-index: 9998;
}
#bloggernotification a {
    border-radius: 3px 3px 3px 3px;
    box-shadow: 0 0 5px rgba(0, 0, 0, 0.35);
    color: #000000;
    font-family: Calibri,sans-serif;
    font-size: 13.5px;
    padding: 1px 7px;
    text-decoration: none;
}
#bloggernotification a:hover {
    text-decoration: underline;
}
#bloggernotification img {
    display: none;
}


"
Step 2:

Again go to template.

Find <body> tag by pressing Ctrl+F.

Now copy the following code and paste after/below the <body> tag.

"
<div class='openbloggernotification' id='bloggernotificationWrap' style='display: block; margin-top: 0px;'>
<div id='bloggernotification'>
Your Message here
</div>  
</div>

"

Now Save your Template .

Thursday, 19 September 2013

How to add Cursor Effect in Blogger

Today I'm going to share a awesome trick for Bloggers. Before this there are several tutorials like bubble , sparkle , or Following star . And this time, another modification that you can do, the object rotates around the mouse as the picture below

Add Cursor Effect in Blogger


You will also see examples of blogs in this demo blog

How to add Cursor Effect in Blogger


1. Login to Blogger >> Template  

2. Find <head> by pressing Ctrl+f

3. And Copy the following code and paste Below the <head>.


<script src='https://ajax.googleapis.com/ajax/libs/jquery/1.5.1/jquery.min.js' type='text/javascript'/>


4. Now Save Template.

5. Go to Layout >> Add a Gadget >> HTML/JavaScript.

6. Copy the following code and Paste into HTML/Javascript Box. 

<script language="JavaScript" type="text/javascript">

var xCol = "#FF0000";
var yCol = "#FFFF00";
var zCol = "#0000FF";

var n = 6; //number of dots per trail.
var t = 40; //setTimeout speed.
var s = 0.2; //effect speed.

var r,h,w;
var d = document;
var my = 10;
var mx = 10;
var stp = 0;
var evn = 360/3;
var vx = new Array();
var vy = new Array();
var vz = new Array();
var dy = new Array();
var dx = new Array();

var pix = "px";

var strictmod = ((document.compatMode) &&
document.compatMode.indexOf("CSS") != -1);

var domWw = (typeof window.innerWidth == "number");
var domSy = (typeof window.pageYOffset == "number");
var idx = d.getElementsByTagName('div').length;

for (i = 0; i < n; i++)
{
var dims = (i+1)/2;
d.write('<div id="x'+(idx+i)+'" style="position:absolute;'
+'top:0px;left:0px;width:'+dims+'px;height:'+dims+'px;'
+'background-color:'+xCol+';font-size:'+dims+'px"><\/div>'
+'<div id="y'+(idx+i)+'" style="position:absolute;top:0px;'
+'left:0px;width:'+dims+'px;height:'+dims+'px;'
+'background-color:'+yCol+';font-size:'+dims+'px"><\/div>'
+'<div id="z'+(idx+i)+'" style="position:absolute;top:0px;'
+'left:0px;width:'+dims+'px;height:'+dims+'px;'
+'background-color:'+zCol+';font-size:'+dims+'px"><\/div>');
}

if (domWw) r = window;
else
{
if (d.documentElement &&
typeof d.documentElement.clientWidth == "number" &&
d.documentElement.clientWidth != 0)
r = d.documentElement;
else
{
if (d.body && typeof d.body.clientWidth == "number")
r = d.body;
}
}

function winsize()
{
var oh,sy,ow,sx,rh,rw;
if (domWw)
{
if (d.documentElement && d.defaultView &&
typeof d.defaultView.scrollMaxY == "number")
{
oh = d.documentElement.offsetHeight;
sy = d.defaultView.scrollMaxY;
ow = d.documentElement.offsetWidth;
sx = d.defaultView.scrollMaxX;
rh = oh-sy;
rw = ow-sx;
}
else
{
rh = r.innerHeight;
rw = r.innerWidth;
}
h = rh;
w = rw;
}
else
{
h = r.clientHeight;
w = r.clientWidth;
}
}

function scrl(yx)
{
var y,x;
if (domSy)
{
y = r.pageYOffset;
x = r.pageXOffset;
}
else
{
y = r.scrollTop;
x = r.scrollLeft;
}
return (yx == 0)?y:x;
}

function mouse(e)
{
var msy = (domSy)?window.pageYOffset:0;
if (!e) e = window.event; 
if (typeof e.pageY == 'number')
{
my = e.pageY - msy + 16;
mx = e.pageX + 6;
}
else
{
my = e.clientY - msy + 16;
mx = e.clientX + 6;
}
if (my > h-65) my = h-65;
if (mx > w-50) mx = w-50;
}

function assgn()
{
for (j = 0; j < 3; j++)
{
dy[j] = my + 50 * Math.cos(stp+j*evn*Math.PI/180) *

Math.sin((stp+j*25)/2) + scrl(0) + pix;
dx[j] = mx + 50 * Math.sin(stp+j*evn*Math.PI/180) *

Math.sin((stp+j*25)/2) * Math.sin(stp/4) + pix;
}
stp+=s;

for (i = 0; i < n; i++)
{
if (i < n-1)
{
vx[i].top = vx[i+1].top; vx[i].left = vx[i+1].left;
vy[i].top = vy[i+1].top; vy[i].left = vy[i+1].left;
vz[i].top = vz[i+1].top; vz[i].left = vz[i+1].left;
}
else
{
vx[i].top = dy[0]; vx[i].left = dx[0];
vy[i].top = dy[1]; vy[i].left = dx[1];
vz[i].top = dy[2]; vz[i].left = dx[2];
}
}
setTimeout(assgn,t);
}

function init()
{
for (i = 0; i < n; i++)
{
vx[i] = document.getElementById("x"+(idx+i)).style;
vy[i] = document.getElementById("y"+(idx+i)).style;
vz[i] = document.getElementById("z"+(idx+i)).style;
}
winsize();
assgn();
}

if (window.addEventListener)
{
window.addEventListener("resize",winsize,false);
window.addEventListener("load",init,false);
document.addEventListener("mousemove",mouse,false);

else
if (window.attachEvent)
{
window.attachEvent("onload",init);
document.attachEvent("onmousemove",mouse);
window.attachEvent("onresize",winsize);
}
</script>


Save and See result.

Additional: For those who change the color of the object, can change in the code.

xCol var = "FF0000 "; 
yCol var = "FFFF00 "; 
zCol var = "0000FF ";

Change the Red Color code in template with your chosen code.

Wednesday, 18 September 2013

Scrolling Like Social Sharing Buttons Widget For Blogger

Scroll Social Sharing widget
Today I'm going to share Scrolling Like Social Sharing Buttons Widget For Blogger. It's going to increase your visitors growth. It will also increase your social group counters just like facebook, google plus & twiters. For anyone who is still struggle to receive a massive traffics from social media marketing websites then were strongly recommended to use this widget. Many individuals called it Don't forget to join our community widget regarding blogger were presenting people as free of costs.
Truly this widget is completely created within Css & javascript having awesome diverse stylishly designing. Due to coding within javascript many Bloggers dislike because many of us also know from so very long that any gadget coded within javascript may compel the blog on filling time. But possibly be trust about me this gadget isn't that much heavy. it has a simple layout as well as less javascript coded incorporated. We possess changed this designing directly into different stylishly designing. It has become decorated having several color. Bloggers usually are advice to choose a greatest one in line with his/her blog site designing & designs.


How does it Work:

As the name "scrolling" by means you can use that by scrolling your mouse here at the top and bottom. This gadget can look if person bring your mouse cursor in the bottom in the blog. When your cursor of the mouse cross the center of blog or maybe website it is going to suddenly seem.

How to Install Scrolling Like Social Sharing Buttons Widget:

Follow easy steps to install this gadget. Choose the color from given colors below according to your template design and color.

Step 1. 
Here is a complete listing of all common colors widget with diverse style. You will only have to pick and also the best one in line with your website designing layout.
This may remember just because after deciding on the widget it colour code will probably replace while using the default colour code into the widget coding. Just simply copy large code from the below leading 14 widgets. Get your individual choice.

#DC143C

Scroll Social Sharing widget

#32CD32

Scroll Social Sharing widget

#9400D3

Scroll Social Sharing widget

#191970

Scroll Social Sharing widget

 #663333

Scroll Social Sharing widget

#808000

Scroll Social Sharing widget

 #B0E0E6

Scroll Social Sharing widget

#D2691E

Scroll Social Sharing widget

#F3F3F3

Scroll Social Sharing widget

#F4A460

Scroll Social Sharing widget

#FFFF00

Scroll Social Sharing widget

#000000

Scroll Social Sharing widget

#708090

Scroll Social Sharing widget

#A0522D

Scroll Social Sharing widget

Step 2. 

Login to Blogger account.

Then go to template and Find this ]]></b:skin> Piece of code by pressing Ctrl+F.

Copy the Following code and paste just before/above ]]></b:skin>.

See in following Image.


Scroll Social Sharing widget

#pbtsocialslide{background:#f3f3f3;
border-radius:9px;
-moz-border-radius:9px;
-webkit-border-radius:9px;
-moz-box-shadow:inset 0 0 3px #333;
-webkit-box-shadow:inset 0 0 3px #333;
box-shadow:inner 0 0 3px #333;
padding:12px 14px 12px 14px;
width:300px;position:fixed;
bottom:13px;
right:2px;
display:none;
z-index:3;
height:65px;}


Replace the Red Color(#f3f3f3) with the gadget code that you have chosen from above given gadget code.

If you want to curve sides of gadget then replace the value from 9px 9px 9px with 3px 49px 49px. It will Look like below gadget.


Scroll Social Sharing widget
Step 3:
 Again go to blogger Dashboard

Go to layout >> Add Gadget >> HTML/JavaScript

copy the below code and paste into HTML/JavaScript Box.

<script type="text/javascript" src="http://ajax.googleapis.com/ajax/libs/jquery/1.4.4/jquery.min.js"></script>

<script type="text/javascript">$(window).scroll(function(){if($(document).scrollTop()>=$(document).height()/4)$("#pbtsocialslide").show("slow");else $("#pbtsocialslide").hide("slow");});function closePBTsocialslide(){$('#pbtsocialslide').remove();$.ajax({type:"POST",url:"/facebookpage.php"});}</script>
<div style="display: none;" id="pbtsocialslide">
<a style="position:absolute;top:14px;right:10px;color:#555;font-size:10px;font-weight:bold;" href="javascript:void(0);" onclick="return closePBTsocialslide();">(X)</a>
<span style="font-family: Tekton Pro; font-size: 20px; margin: 10px 0; text-shadow: 1px 1px 0 #FFFFFF;">Don't forget to join our community!</span><br />
<div style="float:left; margin:15px;"><g:plusone annotation="none"></g:plusone></div>

<div style="float:left; margin:15px;"><iframe src="//www.facebook.com/plugins/like.php?href=https%3A%2F%2Fwww.facebook.com%2FBlogger2wordpress&amp;send=false&amp;layout=button_count&amp;width=80&amp;show_faces=false&amp;action=like&amp;colorscheme=light&amp;font=arial&amp;height=21" scrolling="no" frameborder="0" style="border:none; overflow:hidden; width:80px; height:21px;" allowtransparency="true"></iframe></div>

<div style="float:left; margin:15px;"><a href="https://twitter.com/Blogger2wordpress" class="twitter-follow-button" data-show-count="false" data-size="large" data-show-screen-name="false">Follow @hannygames</a>
<script>!function(d,s,id){var js,fjs=d.getElementsByTagName(s)[0];if(!d.getElementById(id)){js=d.createElement(s);js.id=id;js.src="//platform.twitter.com/widgets.js";fjs.parentNode.insertBefore(js,fjs);}}(document,"script","twitter-wjs");</script></div>
</div>

<div class='clear'></div>


Remember: 
Replace the Red color text with your Facebook Username.

Replace the Light Blue Color text with your twiter username.

Now save it...

Thursday, 12 September 2013

Jquery Image Slider Bar For Blogger

Jquery Image Slider Bar For Blogger


Images sliders are routine and lot of can be found now. But difficult to search working versions of image slider. Because several sliders missing jQuery organised files no longer works. Hope this particular tutorial work for you. However, Photo Slider always really helps to make website more attractive. However right now there have large amount of advantages of with it. We can use if with regard to introduce several offers and new services to each of our audience. We can establish awesome images as outlined by our products or services and share with slider.

Currently I'm gonna share awesome about how to add Jquery Photo Slider. Its made out of jQuery and CSS. Each code are effectively arranged. I added five photos just for this slider. You can customize as ones like. Let see, how to incorporate this image slider with regard to blogger.

How to Add jQuery Image Slider

Login to  Blogger go to template >> Edit HTML.

Now Find </head> by Pressing ctrl+F and paste below code just above/before it. 

<link href='https://bloggertrixcode.googlecode.com/files/animate.css' rel='stylesheet' type='text/css'/>
<script src='https://ajax.googleapis.com/ajax/libs/jquery/1.10.2/jquery.min.js'/>
<script src='https://bloggertrixcode.googlecode.com/files/border-slider.js'/>
<script>/****/
            jQuery(document).ready(function(){
            jQuery(&#39;#bloggertrix_slider&#39;).animatedSlider({
                &#39;loader&#39;:true,
                &#39;width&#39;:900,
                &#39;height&#39;:300,
                &#39;slide_animation_data&#39; :
                    [//slides
                        //slide1 BEGIN
                        [
                            {
                            &#39;target_element&#39;:&#39;.txt1&#39;,
                            &#39;animation_frame&#39;:0,
                            &#39;animation_type&#39;:&#39;tada&#39;
                            },{
                            &#39;target_element&#39;:&#39;.txt2&#39;,
                            &#39;animation_frame&#39;:0.8,
                            &#39;animation_type&#39;:&#39;tada&#39;
                            }
                            ],//slide1 END
                        
                         //slide2 BEGIN
                         [{
                            &#39;target_element&#39;:&#39;img&#39;,
                            &#39;animation_frame&#39;:0,
                            &#39;animation_type&#39;:&#39;bounceInUp&#39;
                            },{
                            &#39;target_element&#39;:&#39;p&#39;,
                            &#39;animation_frame&#39;:0.7,
                            &#39;animation_type&#39;:&#39;bounceInUp&#39;
                            }],//slide2 END
                           //slide3 BEGIN
                         [{
                            &#39;target_element&#39;:&#39;img&#39;,
                            &#39;animation_frame&#39;:0,
                            &#39;animation_type&#39;:&#39;bounceInUp&#39;
                            },{
                            &#39;target_element&#39;:&#39;p&#39;,
                            &#39;animation_frame&#39;:0.6,
                            &#39;animation_type&#39;:&#39;bounceInUp&#39;
                            }],//slide3 END

                          //slide4 BEGIN
                         [{
                            &#39;target_element&#39;:&#39;img&#39;,
                            &#39;animation_frame&#39;:0,
                            &#39;animation_type&#39;:&#39;bounceInUp&#39;
                            },{
                            &#39;target_element&#39;:&#39;p&#39;,
                            &#39;animation_frame&#39;:0.5,
                            &#39;animation_type&#39;:&#39;bounceInUp&#39;
                            }],//slide4 END
                        //slide5 BEGIN   
                         [{
                            &#39;target_element&#39;:&#39;img&#39;,
                            &#39;animation_frame&#39;:0,
                            &#39;animation_type&#39;:&#39;bounceInUp&#39;
                            },{
                            &#39;target_element&#39;:&#39;p&#39;,
                            &#39;animation_frame&#39;:0.4,
                            &#39;animation_type&#39;:&#39;bounceInUp&#39;
                            }],//slide5 END

                        //slide BEGIN   
                         [{
                            &#39;target_element&#39;:&#39;h1&#39;,
                            &#39;animation_frame&#39;:0,
                            &#39;animation_type&#39;:&#39;bounceInUp&#39;
                            },{
                            &#39;target_element&#39;:&#39;p&#39;,
                            &#39;animation_frame&#39;:0.3,
                            &#39;animation_type&#39;:&#39;bounceInUp&#39;
                            }
                         ]//slide END

                    ]});});
        </script>
    <link href='http://fonts.googleapis.com/css?family=Kavoon' rel='stylesheet' type='text/css'/>


Now Find ]]></b:skin> and paste below code just above/before it.

#bloggertrix_slider {margin:0 auto;}
#bloggertrix_slider .slider-contents {overflow:hidden;border:8px solid #DDDDDD;box-shadow:0 0 3px rgba(3,3,3,0.5);}
#bloggertrix_slider .slide-nav {float:left;padding: 0 8px;height: 26px;background: #3a3a3a;}
#bloggertrix_slider .slide-nav a {width: 14px;height: 14px;text-indent: -999px;float: left;list-style: none;display: block;background: #dddddd;margin: 5px 4px;cursor: pointer;}
#bloggertrix_slider .slide-nav a:hover {
 background: #27BAFF !important;}
#bloggertrix_slider .progress-bar {width:0px;background-color:#AAAAAA;height:2px;top: -2px;overflow:visible !important;display:block !important;position: relative;}
#bloggertrix_slider .controls {height: 26px;margin: 4px auto 0;display: table;}
#bloggertrix_sliderr .pause-play-control {width: 46px;height: 26px;float: left;background: #3A3A3A;color: #fff;}
#bloggertrix_slider .pause-play-control a {width:9px;height: 19px;display:block;overflow:hidden;text-indent: -9999px;background:url('http://img837.imageshack.us/img837/7647/fqnu.png');cursor: pointer;margin:3px auto 0;}
#bloggertrix_slider .pause-play-control a.play-slide {background-position:-5px -3px;}
#bloggertrix_slider .pause-play-control a.pause-slide {background-position:-29px -3px;}
#bloggertrix_slider .slider-next,#bloggertrix_slider .slider-prev {
width: 46px;height: 46px;background: #3a3a3a;display: block;font-size: 41px;color: #FFF;font-weight: bold;text-align: center;position: absolute;cursor: pointer;text-indent: -999px;overflow: hidden;}
#bloggertrix_slider .slider-next:before,#bloggertrix_slider .slider-prev:before {background: #3a3a3a url('http://img837.imageshack.us/img837/7647/fqnu.png');width:32px;height:32px;position:relative;top:7px;left:7px;content:'';display:block;}
/*#bloggertrix_slider .slider-next {margin: -220px 0 0 681px;}
#bloggertrix_slider .slider-prev {margin: -220px 0 0 4px;}*/
#bloggertrix_slider .slider-next:before {background-position:-5px -31px;}
#bloggertrix_slider .slider-prev:before {background-position:-5px -70px;}
.slide1 img {position:relative;}
.img-logo {margin-left: 150px;}
.img-mobile {margin-top: 45px;}
.img-tablet {margin: -168px 0 0 139px;}
.img-laptop {margin: -186px 0 0 349px;}
.slide1 {background-color: #67b608}
.slide2 {background-color: #03bbd3}
.slide3 {background-color: #cf6b30}
.slide4 {background-color: #f2a87b}
.slide5 {background-color: #388efd}

Now click on Save template and go Layout.

Click on Add Gadget and Select HTML/JavaScript.

Paste the Following ..

<div id="bloggertrix_slider">
            <div class="slide1">
             <img src="https://blogger.googleusercontent.com/img/b/R29vZ2xl/AVvXsEhDHY7z8QLv1UzyiEdyGTasN2xCzx1br00CohC2RbhQL6SH72uQoBXXJ4_be-jUKI28lAWMNNIG5vOmWopmXdEPiB8LTptsheX1U2sz-5u7-g7pI4LTkfRnAkReIbe_wq65Q9iAJTqxYHs/s1600/bloggertrix1.jpg" />
            </div>
            <div class="slide2">
              <img src="https://blogger.googleusercontent.com/img/b/R29vZ2xl/AVvXsEi1PF371hmJ3cIU_VrpQ-Ap-pF_PuJWedXiF39Q_mYDepr-q3u6dRzU4UFcQ6hJqk6_MfRElSpGIZkzQ8guE1IByWdFdjVzNxEaSQCkM8GX44kHqVQeueJo6UJK1KM9xB0TLpCqc65pJ-E/s1600/bloggertrix2.jpg" />
            </div>
            <div class="slide3">
             <img src="https://blogger.googleusercontent.com/img/b/R29vZ2xl/AVvXsEishG_cG6CY3sn9vog8mPXm17fKbKSZZVgi6qv000sLzTPXuACT61mxdcOhlKwHhlik36Yn3183cuG2s-zdb9mU7ccmj3XNL_lFJNTK74fKZ4evVy_ErnOdDxsCJQfjNUs7I0YNOUJWaAU/s1600/bloggertrix3.jpg" />
            </div>
            <div class="slide4">
             <img src="https://blogger.googleusercontent.com/img/b/R29vZ2xl/AVvXsEgn3l9hPmzTetMep2VOfLswKDQZ5haMNiIXU_iw0GR3b6MMAh5uNGtrj6yrtBRwtDT0x2LBxwY0QV-Ell8ujgsThFsvMhg-IN3eKdHnzHjz4yWenlnJax5fGT6tDVg_bdh7JUQO3WZw1xw/s1600/bloggertrix4.jpg" />
            </div>
            <div class="slide5">
             <img src="https://blogger.googleusercontent.com/img/b/R29vZ2xl/AVvXsEjJkiS03EvYTbjXv_qQS8LAkEO2k56hTKbKd1pE07WRU9EZW7GkZgewv-u3lYqXEmbj621sTtUiZBTvhQ0uH4uKzBXHIhtiuLzO7efXk8NPwEFGZsX3VpZTrB_164qs8GjjE7Kk_xbX13I/s1600/bloggertrix5.jpg" />    
            </div>
        </div>


Replace Red Color URL with your image URL
Now save it..

You are done..